Set ‘Regarding’ to any (eligible) table in single update action in Power Automate
This is one of those really hard to explain in a single title, but really handy to know thing for anyone working with Dataverse Activities & Notes in Power Automate. When you want to set the value of the ‘Regarding’ column, it can be a pretty painful explosion of regarding options with each one specific to a certain table. It’s not too bad if it’s always a specific table, but if its not you end up with either multiple conditional update row actions for each table or a bunch of if() expressions which I failed to get to work reliably.
Some examples where I use this are generating a note or email notification when
a task is completed (could be set ‘regarding’ any table)
a survey response is received (also could be set ‘regarding’ any table)
a marketing form is submitted (could be related to a lead or a contact)
The example below uses Email but this method will work for any ‘Activity’ type table, Note is special and has it’s own special way of doing things because they are ancient and you should respect your elders. And if no one finds this useful except me then so be it.
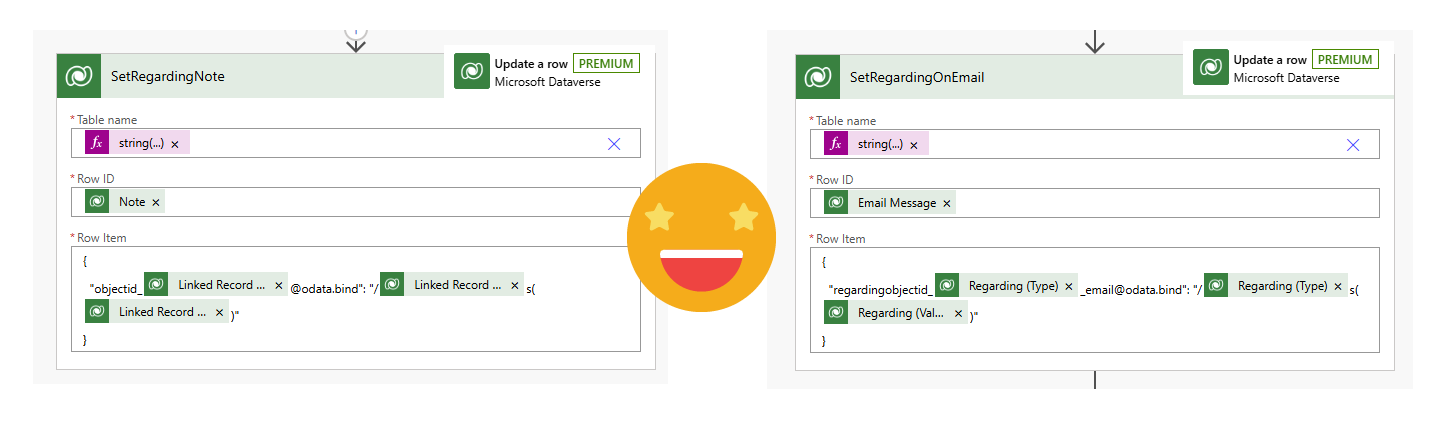
Before

After
And yes, before anyone comes at me for using the classic power automate designer, I checked - the modern one doesn’t get any better.

Create the activity row ‘normally’
This technique to set regarding to any table is best done via an update action, after you have created the row with all the other data you need. You could include all of that as JSON in the ‘Row Item’ but you are creating way more work for yourself here. Step (1) is totally up to you what you define as email content/activity parties etc. and step (3) is helpful if you actually want to send the email.

Update with regarding to any activity enabled table

Table name: string('emails')
Row ID: outputs('CreateEmail')?['body/activityid']
Row Item:
{
"regardingobjectid_[SingularLogicalTableName]_email@odata.bind": "/[PluralLogicalTableName]([RowGUID])"
}
Sample:
{
  "regardingobjectid_contact_email@odata.bind": "/contacts(fcf652f2-49a8-ef11-b8e8-7c1e527384d2)"
}
Note: you need to add the table name as an expression to be able to use the ‘Row Item’ input rather than the specific named columns.

Create the note row ‘normally’
This technique to set regarding to any table is best done via an update action, after you have created the row with all the other data you need. You could include all of that as JSON in the ‘Row Item’ but you are creating way more work for yourself here. Step (1) is totally up to you what you define as note content etc. Step (2) is where the magic happens.


Table name: string('annotations')
Row ID: outputs('AddNote')?['body/annotationid']
Row Item:
{
"objectid_[SingularLogicalTableName]@odata.bind": "/[PluralLogicalTableName]([RowGUID])"
}
Sample:
{
  "objectid_lead@odata.bind": "/leads(a7bc2c74-9c1d-f011-9989-7ced8d17a307)"
}
Kind of niche but kind of cool and super handy for creating more efficient flows. Sorry if this bored you, I will try to be more fun next time.