Trigger a Power Automate Flow from a Custom Button in Dynamics 365 or Dataverse
Since the dawn of Power Automate flows, there has been a need to trigger them on demand directly from a specific row. We can add custom buttons to the command bar In model-driven apps so easily now using the ‘command designer’ and PowerFx directly in the lovely power apps maker portal. Using PowerFx is great for making updates directly to the row which the button belongs to and also related items via a lookup (N:1), but it has it’s limitations and cannot be used to call flows directly.
There are few solutions out there already for triggering a Power Automate flow from a custom buttons/commands including the below, each has its pros/cons:
Triggering a flow from a HTTP request (unauthenticated) 😑
Using patch to populate a hidden field which then triggers the flow to run 😖
Using the chronically problematic, legacy and hidden ‘When a row is selected’ Dataverse trigger in Power Automate 🤬
I’m sure there are more ways but that’s enough to make the point that it’s already ‘possible’ but I think I found a nicer way to do it. This method will use a custom page that opens as a modal when a command button is selected. The custom page ‘OnStart’ property then triggers the flow and returns a response to the user when complete.
Create a Custom Page
You can create a Page from inside a solution or from the model-driven add editor. Either way once it is created make your you save and publish first. Its not even funny the number of times I have closed out of a page without saving and the whole thing has not even been created.


Update page settings
Update the settings of the page for it to be modal sized when it’s launched in the model-driven app.
Create a Power Automate flow to run when the Custom Button is used
The act of the modal custom page being opened is enough to trigger the flow to start doing whatever magic it needs to do here. I find its easier to simply pass in the row GUID and handle the rest inside the flow to retrieve/update data. The custom page is just the messenger.

Create a flow
From the custom page canvas, create a new flow, choose ‘Create from blank’.

Add an input and placeholder magic
Ensure the trigger is using the ‘When Power Apps calls a flow (V2)’ trigger. Add a text input for ‘RecordId’.
Add a Data Operation > Compose action and for now just add some text. What you actually do with your flow to do is entirely up to you. You will probably what to start with Dataverse > Get a row by ID and use the RecordId input as the GUID reference for the row the flow is running against.
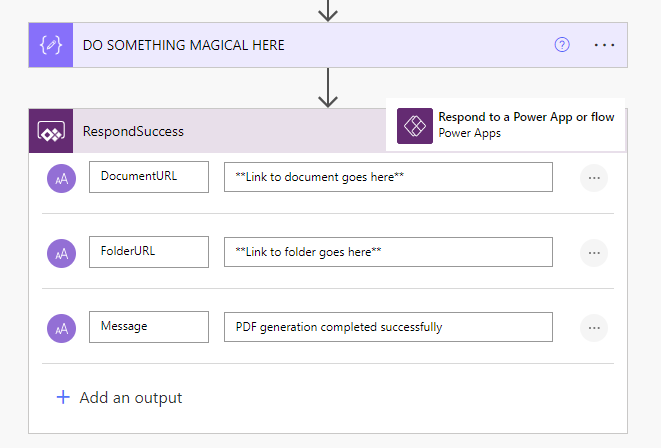
Respond On Success
Next, add a new PowerApps > Respond to a PowerApp or flow action. Rename to ‘RespondSuccess’. Add the below outputs (‘DocumentURL’ and ‘FolderURL’ are there as an example but ‘Message’ is important for later).
Type: Text
Title: DocumentURL
Value: ** useful thing created in the flow 1 **
Type: Text
Title: FolderURL
Value: ** useful thing created in the flow 2 **
Type: Text
Title: Message
Value: ** the message to show to the user when the flow successfully completes ** e.g. ‘PDF generation completed successfully’
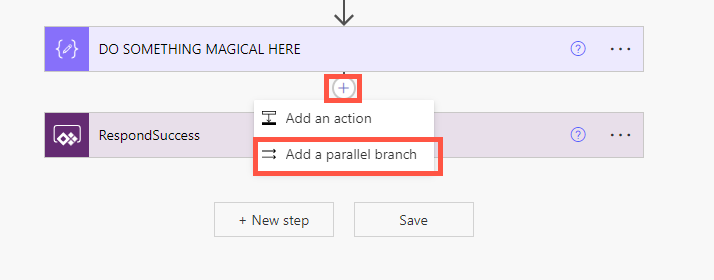
Add a Parallel Branch
Above the ‘RespondSuccess’ action select the + and ‘Add a new parallel branch’.

Respond On Failure
Take a copy of your ‘RespondSuccess’ action and paste it into the parallel branch. Update the name to ‘RespondFailure‘. Update all outputs to ‘null’ except ‘Message’.
Type: Text
Title: DocumentURL
Value: null
Type: Text
Title: FolderURL
Value: null
Type: Text
Title: Message
Value: ** the message to show to the user if something goes wrong ** e.g. ‘There was an error creating the PDF’

Configure the Failure Response
Select the ellipsis (…) on the ‘RespondFailure’ action. Choose Configure run after. Update each of the actions to allow the ‘RespondFailure’ action to run after has failed, is skipped & has timed out.

Check your flow looks something like this once you are done. Save your changes and return to your blank custom page.
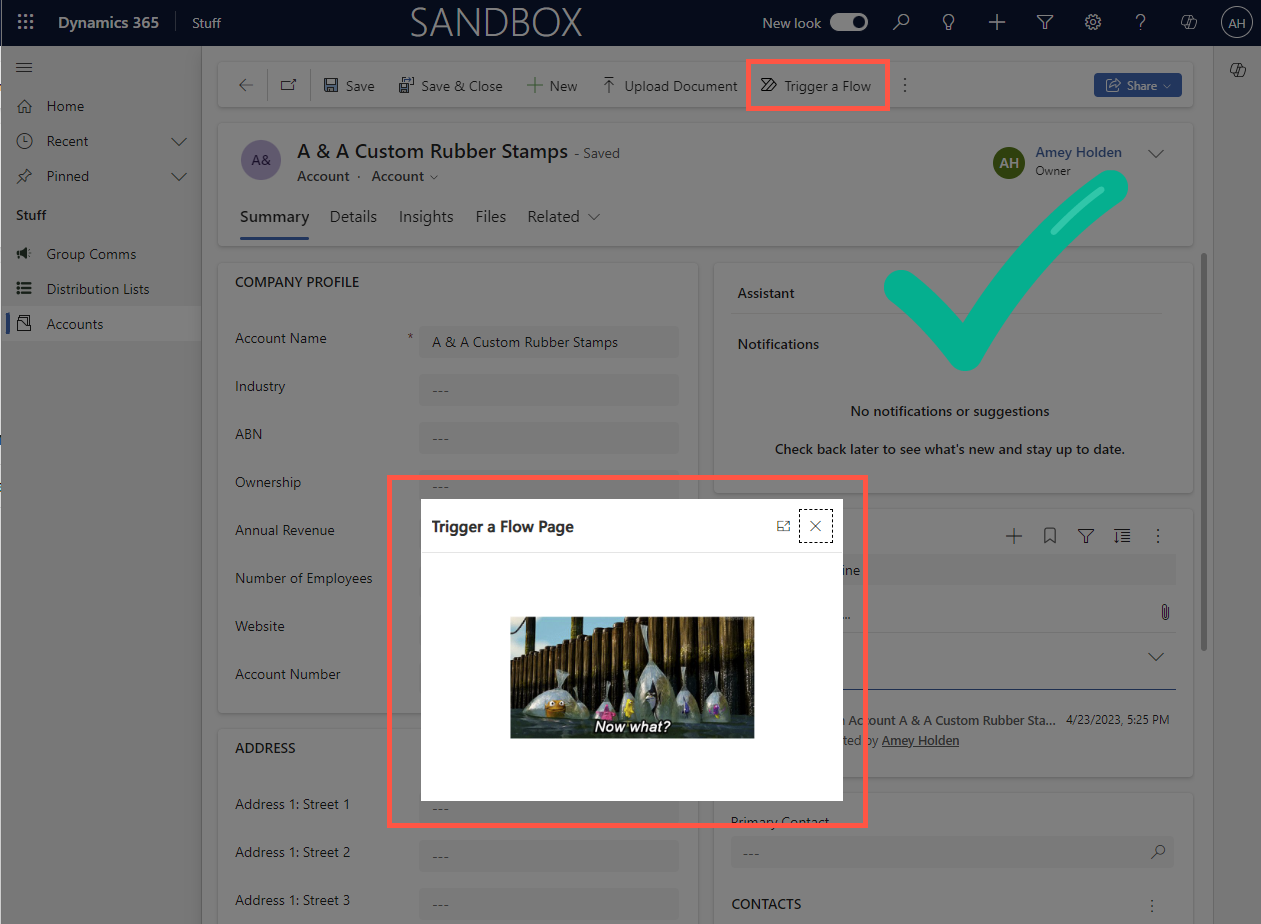
Your custom page should now show the flow as available ‘in your app’. All time best meme imagery optional.
Launch a Custom Page modal from a model-driven app
Now we have a custom page we need to work out how to make the page load inside a model-driven app. I’m not going to go into too much details on this part because Diana Birkelbach has already done such a great job of explaining this part so go here and set up your custom page modal first. Come back when you get to ‘Grabbing the recordId’.
Make sure you save and publish all your changes to the command ribbon/JavaScript Web Resource/Model-driven app. If you are having problems getting your button to work, try launching your browser console (F12) and the errors in there might help.
Now is a good time to check everything is working ok and that you can launch the modal page from within your app successfully. Nothing is going to happen when the modal opens at this stage, but it will after the next part.
Run a Power Automate flow when the Custom Button is used
We are ready to set up the custom page so that the flow runs as soon as the button is pressed and the page opens.

Add a Data Source
Select ‘Data’ from the tree view menu, and ‘Add Data’. Select the Dataverse table which your button has ben added to, in this example I’m going to use Account but this can be any Dataverse table.
Configure App OnStart
The most important part here is the ‘OnStart’ command of the ‘App’ custom page. Select ‘App’ from the tree view menu, and configure the OnStart function. I know there is a lot going on here, but I will try to explain below.

Set(varComplete,false);Set(varInProgLabel,"Loading...");Set(varFlowResponse,Blank());

//Model-driven app record parameters
Set(RecordId, Substitute(Substitute(Param("recordId"), "{", ""), "}",""));
Set(TableName, Param("entityName"));

//Testing stand alone
//Set(RecordId, "**ACCOUNT GUID FROM YOUR ENVIRONMENT FOR TESTING**");
//Set(TableName, "account");

//Lookup record details
Set(RecordItem,  LookUp(Accounts, Account = GUID(RecordId)) );

//Check condition
If(RecordItem.Status='Status (Accounts)'.Inactive,
    Set(varInProgLabel,"This action is not available for deactivated records");Set(varComplete,true),
    //Start automation
    Set(varInProg,true);Set(varInProgLabel,"Creating document, please wait...");
    Set(varFlowResponse,TriggeraPowerAutomateFlowfromaCustomButtoninDynamics365orDataverse.Run
    (RecordId));
    Set(varInProg,false); Set(varComplete,true);Set(varInProgLabel,varFlowResponse.message)
)
We are going to use variables inside the page to control show/hide of various pieces of the page. For example
If the flow is in progress (varInProg) show a spinner
Set the value of label based on what’s happening (varInProgLabel)
Capture the response from a flow (varFlowResponse)
The GUID of the row which the modal was launched from (RecordId) and the table (TableName)
You may need to update the value from ‘TriggeraPowerAutomateFlowfromaCustomButtoninDynamics365orDataverse.Run’ to reflect the name of the flow you created here. And also if you are not using the Account table, the LookUp() formula will need to be updated too.

Capture the flow response values
To build out the bare bones of this page we just need to a way to check the response values are coming back after the flow has run successfully.

Add two buttons which will take the inputs from the flow response for ‘DocumentURL’ and ‘FolderURL’. Update the properties:
Name: BtnOpenPDF
OnSelect: Launch(varFlowResponse.documenturl)
Name: BtnOpenSPFolder
OnSelect: Launch(varFlowResponse.folderurl)

Add a label and set the ‘Text’ property to varInProgLabel

The varInProgLabel is set from the flow response ‘Message’ and shows up in the label.
Test the page
You can Save & Publish then launch the modal from your model driven app to try this out, or you can use the //Testing stand alone section of your OnStart code to test directly in the custom page editor. You just need to remove the // comment lines for Set(Record) and Set(TableName). Provide a valid GUID for RecordId, then Run OnStart.

This should run your flow and your responses should come back to the buttons and label you created above. You can also check in your flow run history to see if that ran ok too.

You should be able to see the label return your ‘Message’ text from the flow response, you can click the buttons to check the URLs provided are there, or click on the OnSelect code and see what values are behind the buttons.

Remember - if you want to go and test the page within your modal driven app you need to comment out the testing code before you publish otherwise it will only every run with the hard coded test GUID no matter where you click the button from!
So if you want just the bare bones - your work here is done. The command bar button is launching the custom page modal, running the flow and responding back when complete. If you want to do some UI enhancements to show things like a loading spinner, show the buttons only when the links are ready and create dynamic messaging for a more informative user experience then carry on!
Create a Better User Experience

Show an ‘In Progress’ Spinner & Label
It’s important to let the user know that something is happening, and what better way to do this that with a label and a lovely spinner GIF.
Add an ‘Image’ control and upload your desired spinner GIF or loading image. It will only show when your flow is in progress by updating the below properties:
Name: SpinnerGIF
DisplayMode: DisplayMode.View
Visible: varInProg
In support of the pretty spinner - use some words to tell the user what’s happening. Update the ‘Label’ control you added earlier with the following properties:
Name: InProgCompleteScreenLabel
DisplayMode: DisplayMode.View
Text: varInProgLabel
Visible: !IsBlank(varInProgLabel)
Color: If(varComplete&&IsBlank(varFlowResponse.documenturl),Color.Red,SoftBlack.Fill)

Show a ‘Complete’ Icon & Label
Once the flow is complete the spinner will disappear so lets replace that with an icon. Add an ‘Icon’ control (choose any, we will update the property to change the icon using conditions next). It will only show when the flow has completed. The completion could be good and it could be bad so lets handle both. The assumption here is that if my document URL returned from the flow (varFlowResponse.documenturl) is blank, something went wrong.
Name: CompleteIcon
Icon: If(IsBlank(varFlowResponse.documenturl),Icon.Error,Icon.Check)
DisplayMode: DisplayMode.View
Visible: varComplete
Color: If(varComplete&&IsBlank(varFlowResponse.documenturl),Color.Red,SoftBlack.Fill)
The label is already set up from the steps above for ‘In Progress’ as the message comes back from the flow and updates varInProgLabel.
Control your buttons
In the majority of cases call a flow on demand means the user is probably expecting some kind of output or response. In this case, a link to a document and a folder which we added earlier as two buttons ‘BtnOpenPDF‘ and ‘BtnOpenSPFolder’, but they should not be available to the user if there is no link to click, update the properties below:

Name: BtnOpenPDF
OnSelect: Launch(varFlowResponse.documenturl)
Visible: And(varComplete,!IsBlank(varFlowResponse))
DisplayMode: If(Or(IsBlank(varFlowResponse.documenturl)),DisplayMode.Disabled,DisplayMode.Edit)
Name: BtnOpenSPFolder
OnSelect: Launch(varFlowResponse.folderurl)
Visible: And(varComplete,!IsBlank(varFlowResponse))
DisplayMode: If(Or(IsBlank(varFlowResponse.documenturl)),DisplayMode.Disabled,DisplayMode.Edit)
Hiding command buttons is offensive UX
You can show/hide command buttons based on row conditions with PowerFX ‘Visibility’ section of the command editor, however this is a pet peeve of mine. Hidden buttons are so confusing, there is no explanation to why the button is missing, it’s just gone - yuck! Instead lets tell the user why the button is not available, knowledge is power! In the section ‘Configure App OnStart’ we added a check condition, what this does is to check various bits of data to decide if the flow should run. This one is quite simple to just check if the account is Active/Inactive and if it’s a deactivated row - we show a very clear message to explain.

The cool thing is you can add multiple conditions/checks/messages here with a great level of complexity too. You can check data in related records and any other data source you might have using the full library of PowerFx commands. Nice!

That’s a wrap
Inspiration GIFS are all I have left. I love custom pages!

